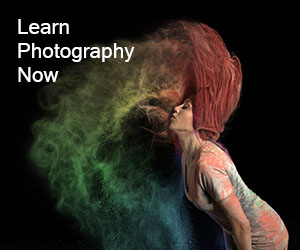
Photography
techniques, tips and tricks which make
your photograph more attractive (Portrait photography)

First of
all when you admitted yourself for having dexterity of drawing , what had
you done. Obviously you wanted to emulate something precisely on your drawing board.
You were taught to make appropriate sketch and place sense which can make a photo
also make so attractive like an art. For this reason a photographer has to be
more careful about background, placement, shadow and lighting as well as the
position also.
Take a look below some photography techniques, tips and tricks for taking pictures of anything
Portrait photography mistake:
1)Too much depth of field: As
alluded to previously, selecting a small aperture to create extensive depth of
field isn’t always a good idea with a portrait.

If the background is busy or cluttered it may distract from your subject. Choosing a wider aperture, for example if/5.6 will often produce better results.
Even if the background isn’t heavily blurred, restricting the depth of field
a little separates your subject from the surroundings giving them greater
dominance in the shot.
If you find that the background isn’t as blurred as you would like, ask your
subject to step forward, increasing the distance between them and it.
You could also switch to a longer focal length lens as this will result in
less depth of field at the same aperture, although you will have to move
further away from your subject to maintain the same composition.
2) Unusual head-wear : One of the all-time classic errors when shooting people is to not pay enough attention to the background and as a result end up with shots that have lampposts, trees or flagpoles sticking out of the top people’s heads.

It may be possible to avoid this by shooting with a wide aperture to blur the background, but it’s often just a case of taking a few steps to one side of the other to give them a different background.
3) Shooting wide: Although you can produce really funky shots with a wide-angle lens, few of them tend to find favor with the subjects.

o stand
further away so you need more space to work in.
Using a longer lens has the added advantage of restricting depth of
Wide-angle lenses make close subjects look much bigger than those that are
further away and with a portrait this can mean a big nose, above a receding
chin, on a small face with tiny eyes.
It’s far more flattering to shoot from a little further away and use a
longer lens as this will help keep the sitter’s facial features in proportion.
While an effective focal length of 50mm (or wider) lens may be a good choice
for an environmental portrait, where the subject is in their workplace, for
example, and you’re not too close, something a little longer, perhaps around
70-85mm, is often regarded as a good choice for head and shoulders shot.
Don’t forget, that a 50 mm lens is equivalent to around 75 mm on and an
APS-C format SLR, so your standard prime lens can be an excellent choice.
Longer telephoto lenses also work well, although you’ll need t
field so
the background is blurred slightly putting greater emphasis on your subject.
4) Eyes not sharp: As a general rule the eyes in a portrait
image should be sharp. This is especially important if you’re shooting with the
aperture wide open to restrict depth of field.
Shallow depth of field is a great way of directing the viewer’s attention
towards the subject, and if the wrong part of the image is sharp that’s where
the viewer will look.
With a portrait this means that it’s no good focusing on the sitter’s nose,
the focus point needs to be right on one of the eyes.

If you normally let the camera select the autofocus point for you, it’s time
to take control and set it yourself. Your camera manual will explain exactly
how to do this, but look for an option called something like one point or one
area auto focusing.
Alternatively, if your subject isn’t moving you could try focusing manually.
In this case it’s worth using your camera’s live view mode and composing the
image on screen with the camera on a tripod.
It’s usually possible to magnify part of the scene so that you can be sure
that the focus is spot-on. With a portrait you want to magnify the eyes and
focus on them.
An added advantage of shooting with the camera on a tripod and composing the
image on the camera’s screen is that it’s easier to engage your subject in
conversation, helping them to relax and making the shoot almost incidental.
PORTRAIT PHOTOGRAPHY TRICKS :
A common photography problem when shooting portraits light skin tones is under-exposed portraits. You’ll notice this more when shooting full-face photos or when there’s lots of white in the scene – brides at weddings are a prime example. To brighten up subjects when using Aperture Priority mode, you can try using Exposure Compensation.

Try dialing in up to +1 stop of positive Exposure Compensation to lighten up people’s faces.
02) Aperture advice:When shooting portraits, it’s best to set a wide aperture (around f/2.8-f/5.6) to capture a shallow depth of field, so the background behind your subject is nicely blurred, making them stand out better.
Shoot in Aperture Priority mode to control depth of field in this mode your SLR will helpfully set the shutter speed for a correct exposure.
Specialist portrait lenses tend to have even wider maximum apertures (from f/1.4 to f/2.8) in order to blur backgrounds further.
03) Shutter speed settings:When setting shutter speed, factor in your lens’s focal length otherwise camera-shake (and blurred results) will become an issue.

As a general rule, make sure your shutter speed is higher than your effective focal length. For example, at 200mm use a 1/250 sec shutter speed or faster.
This also means you can get away with slower shutter speeds when using a wide-angle lens – such as 1/20 sec with an 18mm focal length.
04 Increase your ISO: People move around a lot as they’re photographed, not to mention blink and constantly change their facial expressions – and there’s nothing worse than a photo of somebody half-blinking or gurning instead of smiling!

To avoid these problems, and to prevent motion blur appearing, you’ll need
to use a fast shutter speed.
This will also help to ensure sharp shots and avoid camera-shake because
more often than not you’ll be shooting portraits handheld.
While in Aperture Priority mode and maintaining a wide aperture, to increase
your shutter speed simply increase your ISO (from ISO100 to ISO400, say).
In low light (indoors and outside), you may need to increase it to ISO800,
1600 or even 3200.
A little grain is infinitely better than a blurry, useless
photo.
05 Lens choice : Your choice of lens has a big impact on your portrait photos. A wide-angle
(around 18mm) lens captures a wider angle of view, so more of your subject’s
surroundings will be in shot.
A telephoto (over 70mm) lens captures a narrower angle of view, and less of
your subject’s surroundings will appear in frame. Focal length also affects
depth of field (DoF).
A wide-angle lens will capture more depth of field compared to a telephoto
lens. This is why telephoto lenses are favoured over wide-angle lenses for
portraits, as they further knock backgrounds out of focus to make people more
prominent in the scene.
No comments:
Post a Comment